How To Polish Wood Floors
How Do I Get My Hardwood Floors To Shine Again?
Achieving that brilliant, magazine-cover shine for your hardwood floors isn’t as daunting as it seems. Whether you’re prepping for the holidays or simply want to revitalize your living space, restoring the luster of your floors can make a dramatic difference. Here’s a comprehensive guide to help you achieve that shine once more.

Preparation: Cleaning and Moving Furniture
Begin by thoroughly cleaning your hardwood floors. Start with sweeping or vacuuming to remove dust and debris. It’s crucial to follow with a damp mop using a commercial wood floor cleaner mixed with warm water. This combination effectively lifts grime and ensures a thorough clean, leaving the surface spotless before you proceed to avoid sealing in any dirt beneath the polish.
Next, move all furniture out of the way. This will give you full access to the floor’s surface and help you apply the polish evenly. Remember, a well-prepped floor is the first step towards a beautifully polished sheen.
Selecting the Right Polish for hardwood floors
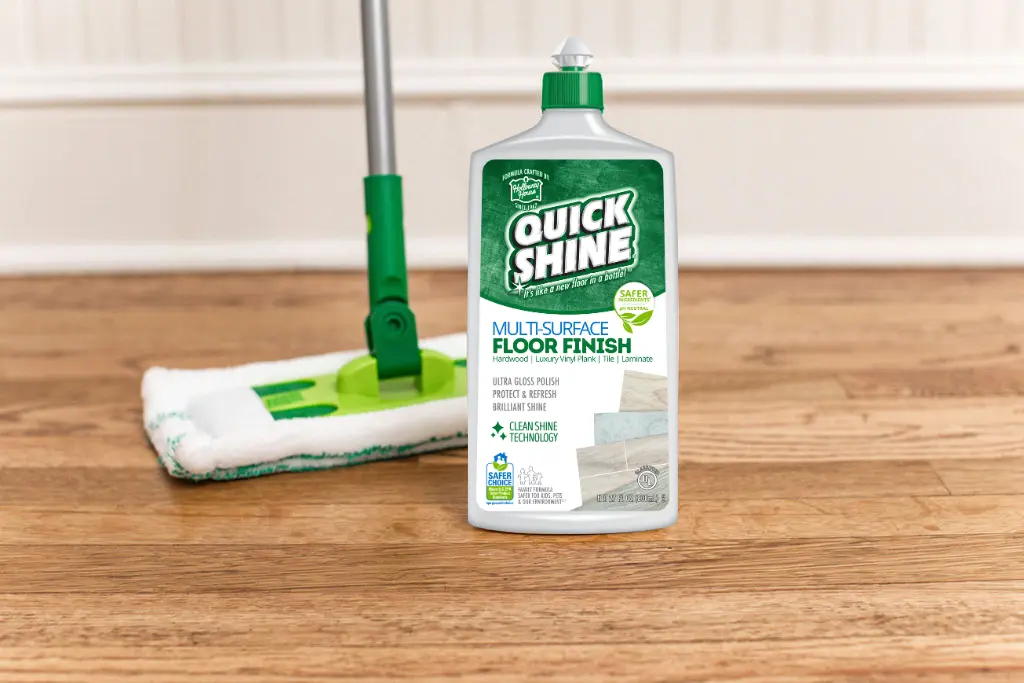
Choosing the right Wooden Floor Polish Liquid or product is essential. There are many available options, but products like Quick Shine Multi-Surface Floor Finish and Quick Shine Hardwood Floor Luster have received rave reviews for their ease of use and effective results. Always read the label to ensure compatibility with your floor type and finish.
Application Process
Now that your floor is clean and free of obstructions, it’s time to apply the polish. Squirt a small amount of floor polish directly onto the floor in an “S” pattern, starting at the farthest corner from the room’s exit. Using a soft, dampened cloth or mop head, work the polish into the floor using a back-and-forth motion in the direction of the wood grain. Ensure you spread the product thinly and evenly to avoid streaks or puddles. Once all of the polish has been applied to the entire floor, allow your floors to dry 45-60 minutes before letting foot/pet traffic back on them. Enjoy the WOW Factor!
Maintenance Tips For wood floors
To maintain that freshly polished look, adopt a regular cleaning schedule that includes sweeping, vacuuming, and mopping with a suitable wood cleaner. Avoid using harsh chemicals or abrasive tools that can dull the finish. Additionally, placing rugs in high-traffic areas and using furniture pads can protect the floor from scratches and wear. A quick reapplication of polish every few months can also help keep your floor looking its best. Regular cleaning and preventative measures are essential to maintain the wood floor’s shine and achieve long-lasting beauty.

Can You Polish Wooden Floors Yourself?
Polishing your wooden floors by yourself is not only possible but can be incredibly rewarding. Not only will you save money by doing it yourself, but you’ll also gain a sense of pride in maintaining your home. With the right tools and techniques, your floors can shine as if they were done by a professional. Here’s how you can do it.
Required Tools and Materials
Before starting, gather all the necessary tools and materials. You will need wood floor polish (ensure it’s appropriate for your floor type), a microfiber mop, and a hard surface floor vacuum. Additionally, use a few drops of dishwashing liquid or paint thinner for effective cleaning without damaging the floor’s finish.
Step-by-Step Instructions
First, clear the floor of furniture and debris. For wood flooring, vacuum thoroughly to remove all dust and dirt; any particles left behind can scratch the floor during polishing. Once cleaned, apply a small amount of the polish to the microfiber mop or a soft cloth. Work in small sections, applying the polish evenly. Allow it to dry completely before applying additional coats. Repeat the process if needed to achieve the desired level of gloss.
Safety Precautions
Ensure the room is well-ventilated by opening windows or running fans. Follow the manufacturer’s instructions on the polish label to avoid over-application or damage to your floors.
Common Mistakes to Avoid
Avoid using too much polish at one time, as it can lead to a sticky residue that’s hard to remove. Skipping the vacuuming step can cause scratches, so it’s crucial not to overlook this initial step. Lastly, always test the polish on a small, inconspicuous area first to ensure it won’t discolor or damage your floors.
Polishing your wooden floors yourself can be a simple and enjoyable task with the right preparation and attention to detail. You’ll be amazed at how a little effort can transform the look and feel of your home.
Should I Wax Or Polish My Hardwood Floor?
As a homeowner or cleaning enthusiast, you may be wondering whether to wax or polish your hardwood floors. Each method offers its own set of benefits and drawbacks, making the decision dependent on your specific flooring type and maintenance preferences.
Differences Between Waxing and Polishing
Waxing involves applying a wax-based product to your floors, which fills in any small scratches and leaves a protective layer. It is often recommended for older or more traditional hardwood floors. Polishing, on the other hand, typically uses a water-based or oil-based liquid that enhances shine and provides a smoother surface. Polishing is generally more suitable for modern, pre-finished wood floors.
Pros and Cons of Each Method
Waxing provides a strong, durable finish that can protect your floors longer. However, it requires a bit more upkeep, such as periodic buffing and reapplication. Polishing, while easier and quicker to apply, may not offer the same level of protection, necessitating more frequent applications.
Recommendations Based on Floor Type
If you have an older or more porous hardwood floor, waxing might be the best option for you. It enhances the floor’s natural character and provides lasting protection. For newer, pre-finished, or engineered wood floors, polishing is usually recommended as it is less invasive and quicker to apply.
Top Products in Each Category
When it comes to waxing, Bona Hardwood Floor Polish and Quick Shine Pure Wax are popular choices known for their high-quality results. For polishing, products like Quick Shine High Traffic Hardwood Floor Luster and Quick Shine Multi-Surface Floor Finish are highly recommended for their ease of use and effectiveness.
Ultimately, the choice between waxing and polishing depends on your floor type, maintenance willingness, and what kind of look and protection you aim to achieve.
How To Buff Hardwood Floors Yourself?
Buffing your hardwood floors can restore their luster and make your home feel fresh and inviting. It’s a task that can be done by homeowners themselves with the right tools and a bit of patience.
Equipment Needed
Before you start, gather essential equipment: a floor buffer, buffing pads, a vacuum cleaner, a mop, and your choice of Quick Shine Hardwood Floor Luster or another quality floor polish. Make sure you also have safety gear like gloves and masks, especially if you’re using chemical products.
Preparation Steps to shine wood floors
Preparation is key to a successful buffing session:
1. Clear the Space:
Remove all furniture and rugs from the area. This ensures you have a completely open space to work with, preventing any interruptions or missed spots.
2. Clean the Floor:
Start by vacuuming thoroughly to remove any dust or debris. Follow this with a damp mop to clear any remaining dirt. Make sure the floor is completely dry before you start buffing.
Buffing Process for hard woods
With preparation complete, you can start the buffing process:
1. Attach the Buffing Pad:
Secure the buffing pad to the floor buffer. Make sure it’s properly centered to avoid uneven buffing.
2. Apply Polish:
Evenly spread a small amount of wood floor polish over a manageable section of the floor when polishing hardwood floors. You don’t want to over-apply, as this can cause slipping and uneven shine.
3. Start Buffing:
Turn on the buffer and slowly move it over the floor in a back-and-forth motion. The buffer will spread the polish and bring out the floor’s shine. Work systematically in sections, ensuring you cover the entire floor evenly.
Finishing and Maintenance
After buffing, let the floor dry completely. This usually takes a couple of hours, depending on the polish used. To maintain your newly buffed floor, clean regularly and consider adding felt protectors under furniture to prevent scratches.
Regular touch-ups with a buffer and using high-quality products like the Best Polish for wooden floors can keep your floors looking impeccable.
Enhance your floor care routine with Quick Shine Smart Living Clean Solutions. Experience the Quick Shine difference using our pH-neutral, effective, and environmentally friendly cleaning and polishing formulas.
